Digital Studio #00: A Tour of my Personal Digital Studio
What tools do I use for literally everything.
This post is going out to 106 people this week! Thank you for making my 2020 goal a reality with lots of time to spare. I’ve been thinking of what my next goal should be and right now I think I’ve landed on making $1 online by the end of my third year of medical school (so May 2021). I think it’s possible but I’ll write another post about that at some point.
Quick warning: This is a long post and a new concept that I’m experimenting with. Please feel free to jump around to different parts of it that you find interesting! Also, if you have thoughts or comments you can always find me on Twitter @akiffpremjee. I’d also love if you subscribed to the newsletter and join me through my writing journey!
If you’re a productivity nerd like me, then more than actually being productive (haha!) you enjoy seeing how other people set up their productivity systems. This is basically the nerd equivalent of people watching gamers on Twitch.
Some time ago, I found series made by Sara Dietschy and MKBHD on YouTube where they would explore the physical studios of different creators. MKBHD did an episode of this where he went into Casey Neistat’s NYC studio and walked through how Casey organizes his space but more importantly what he uses different aspects of his studio for and how it helps his creativity.
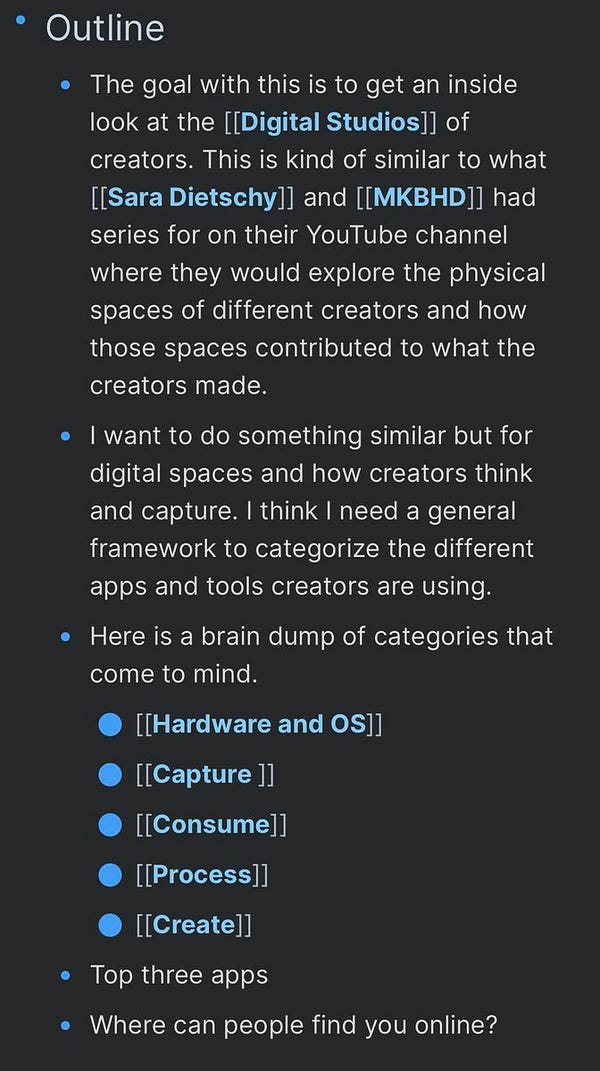
I recently had the idea that it would be cool to do this for Digital Studios - the same idea but instead of looking at physical spaces, taking a dive into digital systems that creators use to create. I put the idea out on Twitter with a brief outline of what I was thinking and had a great response (so far 8 people are down to be interviewed!).


Now I actually have to do the series! So to kick things off, I thought I would do a self-reflection and “interview” myself and share my Digital Studio.
Overview
Here is what we will cover (feel free to jump around to what interests you):
What’s the goal?
Hardware and OS
Plan: To-do lists, calendars, and daily templates
Capture: How do I save information to dive into later?
Consume: Tools for reading articles and books? Audiobooks and podcasts?
Process: Note-taking and building a second brain
Create: What do I make and how do I make it?
What’s the goal?
The goal of my Digital Studio includes three things:
Learn about new and interesting topics to broaden my knowledge (very vague)
Output one newsletter post for Tools for Growth each week
Organize tasks that need to be done for life + school
Ideally everything in my system contributes to one of these three goals.
My first goal is vague and broad on purpose. “Learning” can encompass basically everything. In a more perfect world, I would have an area that I am focused on learning about and utilize my system to learn about that specific thing (e.g. health policy, productivity systems, healthy eating and exercise habits). However, I like that it’s broad so that it doesn’t limit me in what I’m learning about in a given moment. More opportunity to discover new things.
The latter two goals are more easily quantifiable as they can be tied to outcome metrics (Did I publish a post? Did I get my tasks done?). I’ll dive into the tools I use to make each one of these goals happen below.
Hardware and OS
I’ve committed to the Apple ecosystem. Currently, I’m using my iPad Pro full time due to some computer issues but will be back on a Macbook Pro by the end of the month. I’ve got an iPhone 11 Pro and an Apple Watch as well. The ecosystem has captured me fully (Airpods Pro and all).
MKBHD made a great video about the Apple Ecosystem that talks about how once you’re in the ecosystem, you basically can’t get out. I used to be on Macbook + Pixel but iMessage is what brought me over to the dark side. I haven’t looked back since.
Outside of my Apple devices, the main pieces of hardware I have are my Kindle, Dell monitor, DAS Keyboard 4 Professional, and Logitech G502 Gaming Mouse (not for gaming but mapping buttons to it is great).
I’ve found that having hardware that makes work more pleasurable helps with getting more work done (at least that’s what I tell myself!). I enjoy good aesthetics and setups so I’ve done my best to create one for myself that was within my budget.
Plan: To-do lists, calendars, and daily templates
Planning is probably the area that I’m strongest in. Partly because I’ve been doing it for a long time and partly because I’m a crazy medical student that has to stay on top of 532 different things at the same time always. I have a pretty simple setup and it consists of three apps: Things 3, Fantastical, and Roam.
Things 3
Things 3 is my go-to to-do list app. I’ve tried tons of to-do list apps (even tried to build my own) and ended up paying for Things 3 on all my devices because I really liked it. There are three reasons why I use Things over other to-do list apps:
Great design and UI. It looks really good on all devices which I want in an app I’m going to be looking at multiple times a day.
Keyboard shortcuts! I can navigate the entire app with my keyboard and don’t have to use a mouse to do anything. There is also quick capture from anywhere on my Mac (and iPad and iPhone with Siri Shortcuts).
Having just Areas and Projects is perfect for me. I don’t need layers and layers of granularity in a to-do list app. Keep it simple, stupid.
Fantastical
I only recently started using Fantastical and the killer feature is of course it’s natural language engine where I can add an event to my calendar by saying something like “Dinner with Wesley on Thursday at 8 PM at Prince Street Pizza” and Fantastical will fill in everything in the event correctly. Saves a ton of time and I highly recommend it.
Roam
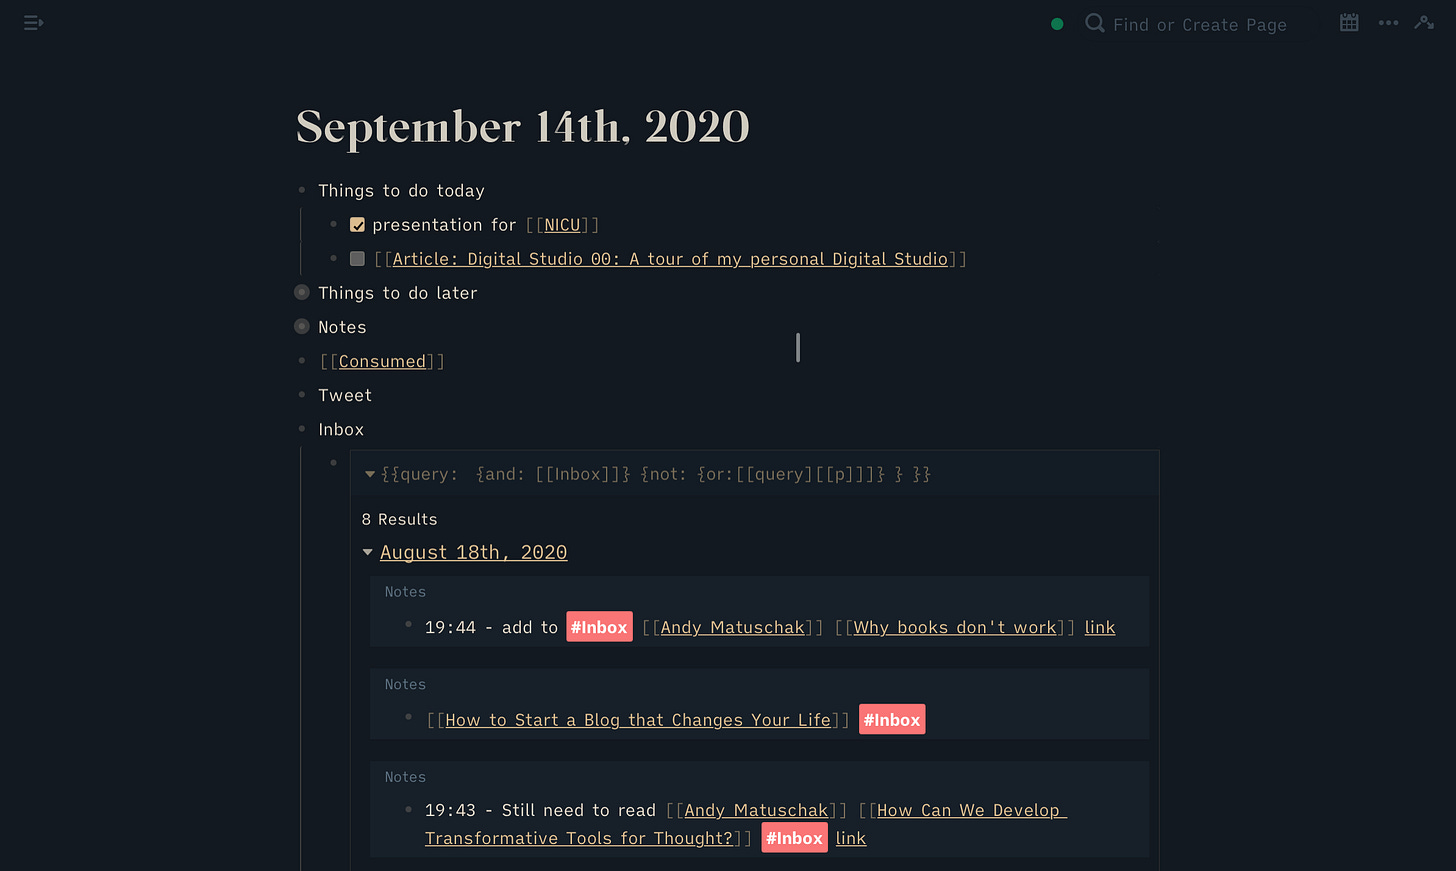
I started using a daily template in Roam because I wanted it to be the central hub of my workflow each day. Each morning I open Roam and run a command (via Roam42) to create a daily template. I then go to Things 3 and copy over to-dos from my “Today” view into my daily template. These are the only to-dos I’ll be working on in a given day. Getting them out and away from my to-do list app gives me piece of mind and I know that I won’t have to look at a million to-dos I’m not getting to that day.
My Roam template also has other areas like Notes, Consumed, and Inbox where I take notes on things I find interesting, add articles I consume each day (though this is phasing out due to Readwise to Roam automation), and Inbox where I tag high priority articles I want to read (more on that below). Here’s what that looks like:

Capture: How do I save information to dive into later?
This is still a work in progress. Mostly because I’m trying to become better about reducing what I take in and instead being more focused about my reading. I discuss this in my essay on How to Survive the Age of Information Exhaustion.
Right now I use a combination of open tabs, email (for newsletters), Instapaper (to quickly save articles), and a personalized Inbox I made in Roam for higher priority articles I want to read (you saw it in the image above).
In terms of how I find content to read, Twitter is my go to source. I have a Twitter list of ~50 accounts that I use as my primary feed. If one of these people shares an article or resource, I value it higher since this is a filtered list of people I’ve decided to primarily follow on Twitter.
I’ll open links in Twitter I find throughout the day and quickly browse. If it’s something I may want to look at later I’ll add it to Instapaper. If it’s something I definitely want to read, I’ll take the extra step to add it to my Roam Inbox. I rarely do this and it’s mostly for longer pieces or series of posts that I want to dive into. I’ve found that since it takes more steps to add content to my Roam Inbox, it has to be something I think is higher quality and worth my time when I sit down to read a longer piece.
Consume: Tools for reading articles and books? Audiobooks and podcasts?
Let’s start with articles.
I actually prefer reading articles in a browser. Instapaper puts them in a readable format but I like to see how the author wanted the article shown on their site. It feels more personalized that way.
I’ll open an article in browser on my computer, iPad, or iPhone and decide if it’s something that I eventually want in my Roam database. Roam is where I want all notes and highlights to eventually end up. I don’t feel strongly that everything I read should be in Roam so if I see an article I find interesting and just want to read but not save forever, I just read it and then close the tab, simple.
However, if I find something that I want to highlight and take notes on later I use Hypothes.is which works both on desktop and mobile and, importantly for me, is free #studentbudget. I like using Hypothes.is because my highlights are synced to Readwise which then imports directly to Roam. Readwise has been a complete game changer for me in terms of pulling together all sorts of highlights and then adding them to Roam. (If you’re interested in how to use Readwise, Blake Reichmann wrote a guest post last week on his workflow.)
Books are simpler.
I’ll be honest. I haven’t been the best about reading books. I want to read more of them but I don’t make the time to do so with school and everything else, but it’s really just an excuse. I’m hoping to get better at this but wanted to put that out there and be honest with you.
When I do read, I either read physical books or books on my Kindle. Physical books get some highlighting and note taking in Roam though I haven’t built a full system for this yet. I’m experimenting with Readwise’s photo capture feature where I can take a picture of the text and Readwise will do text detection and add highlights. I like this so far and it’s another way for my highlights to end up in Roam.
For Kindle, the workflow is to highlight in Kindle and then sync to Readwise and then Roam (are you seeing a pattern here?).
Podcasts
My podcast game has improved drastically since discovering Airr. This is one of my new favorite app and I’m always excited to use it. The premise is that you can take AirrQuotes as you are listening to a podcast. These are small clips that get tagged in the podcast. Airr can then sync these clips with Readwise and they end up in, you guessed it, Roam.
This is already awesome, but the game changing feature is Transcripts in Airr. If a podcast has a transcript, then that also gets pushed to Readwise and Roam so you have the text available for when you want to take notes and don’t have to re-listen to clips if you don’t want to. If a transcript isn’t available you can request one (though there is a daily and weekly limit on this right now) and if one ever becomes available in the future, it automatically gets added to your Readwise and Roam as an update.
Airr has truly changed the way I listen to podcasts because I feel like I can actually learn from them now rather than just passively listening to interesting content. For more info, you should definitely check out Nat Eliason’s article on Airr.
Process: Note-taking and building a second brain
The name of the game is Roam.
As you’ve read in the previous sections, all of the tools I use are to optimize for everything ending up in Roam. I’m treating Roam as my “second brain” and the ideal state is for all inputs to make it into Roam so that I can then process and refine them further into my own thoughts that can then ideally be used in other areas (writing blog posts, making connections between different topic areas, keeping a personal medical repository as I go through medical school, etc.).
The Process stage is also the stage where I lack the most growth (for now). This makes sense of course because it is much easier to take in content than to spend time going through highlights and developing my own insights. This takes time and work but it is something I am excited and want to do.
In order to improve this for myself, I’ve turned it into a sort of game. Everything that comes in from Readwise gets a “To Process” tag. Right now I have 53 items that need to be processed. So anytime I have a free moment (and hopefully soon to be added to a nightly routine), my goal is to process 1-2 items from the “To Process” tag. This includes adding metadata and tags, cleaning up titles and formatting, and then working to formulate a few unique thoughts on whatever I am processing. I will then mark that item as “Processed” which gets filtered out of my “To Process” page.
I’m not too worried about extreme progressive summarization right now (maybe I will in the future) because as long as I have good tags on a page, I will be able to resurface it and think about it later when I need to use it for writing or connecting with another topic I come across. This not so strict structure also makes me want to process through things because I know it won’t be a super long task to complete. The goal is to make sure that I’m having fun maintaining my second brain. If it’s not fun, I won’t want to do it.
Create: What do I make and how do I make it?
So it’s pretty obvious that I write a newsletter each week (smash that subscribe button!). Because all my notes are in Roam, I also use Roam as my writing tool where I create outlines and drafts for each post.
Roam is useful for two phases of my writing: brainstorming and actually writing. Because of the tags and links, I can quickly open up multiple pages in the sidebar to find interesting things to include in a post that I’m writing up. This is great for inspiration and to uncover topics that I read about previously but may have totally forgotten about.
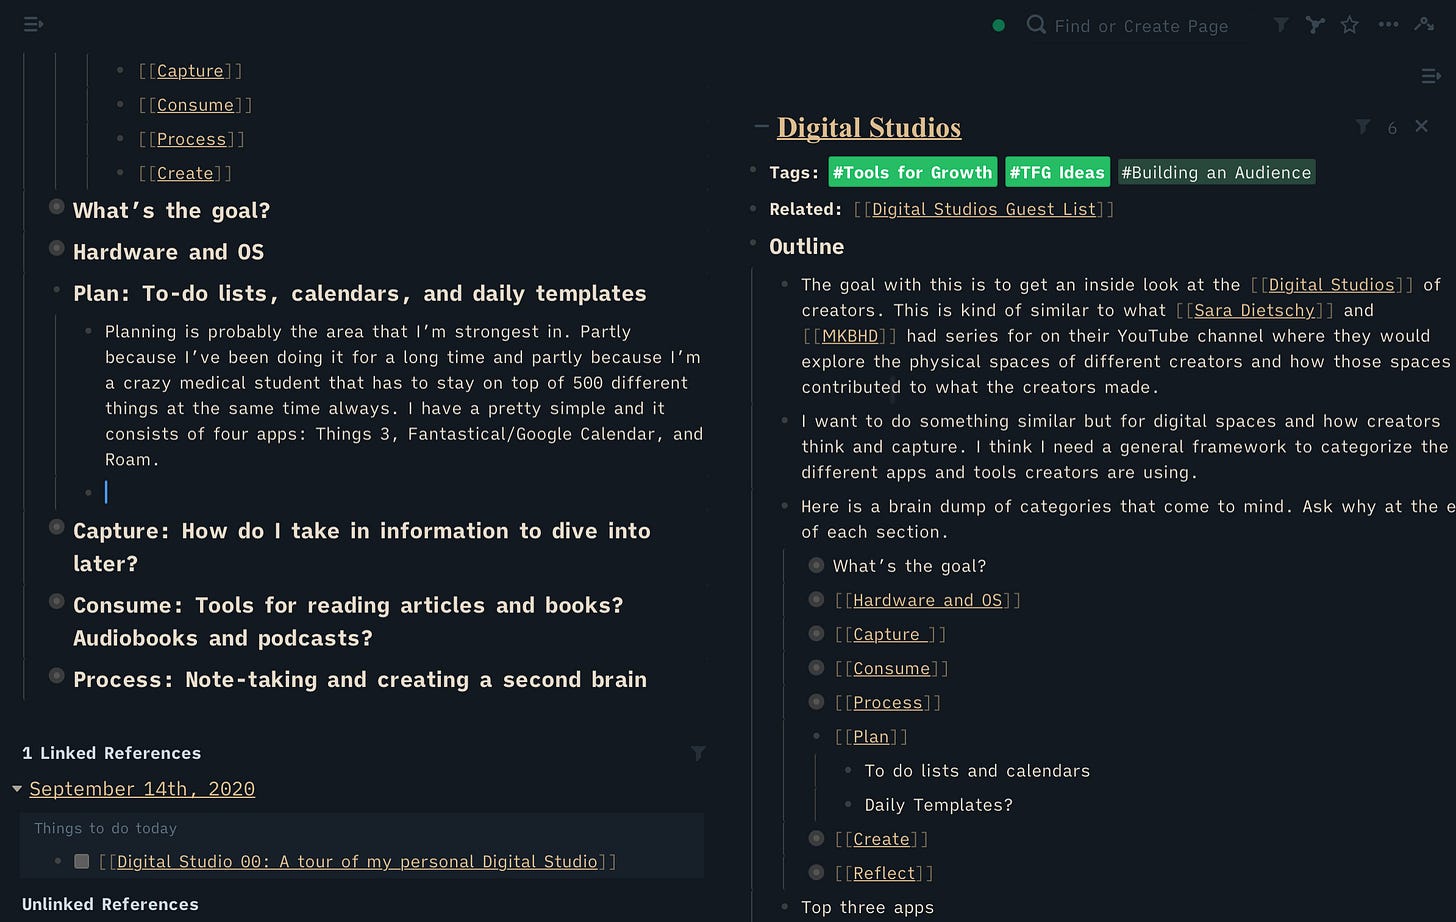
The side bar is also a good tool for having my outline open as I write an article. This saves me from having to scroll through the document again and again or having multiple windows and switching between them. It lets me just write without any interruption which is exactly what I need.
Here’s what it looked like to write this article in Roam. Note that I have my outline open in the sidebar on the right and I’m writing the article on the left. Being able to collapse bullets and focus in on a specific part of the article is also very helpful and makes my writing much more efficient.

After I write my post in Roam, I use Roam Tools built by Ryan Guill to post-process and clean up the Roam formatting and then paste my post into Substack. This is also where I do my editing and any additional link and photo adding. I like doing this here because it gives me a better idea of what the post will also look like when it goes out. Once I’m happy with the way something looks, I ship it!
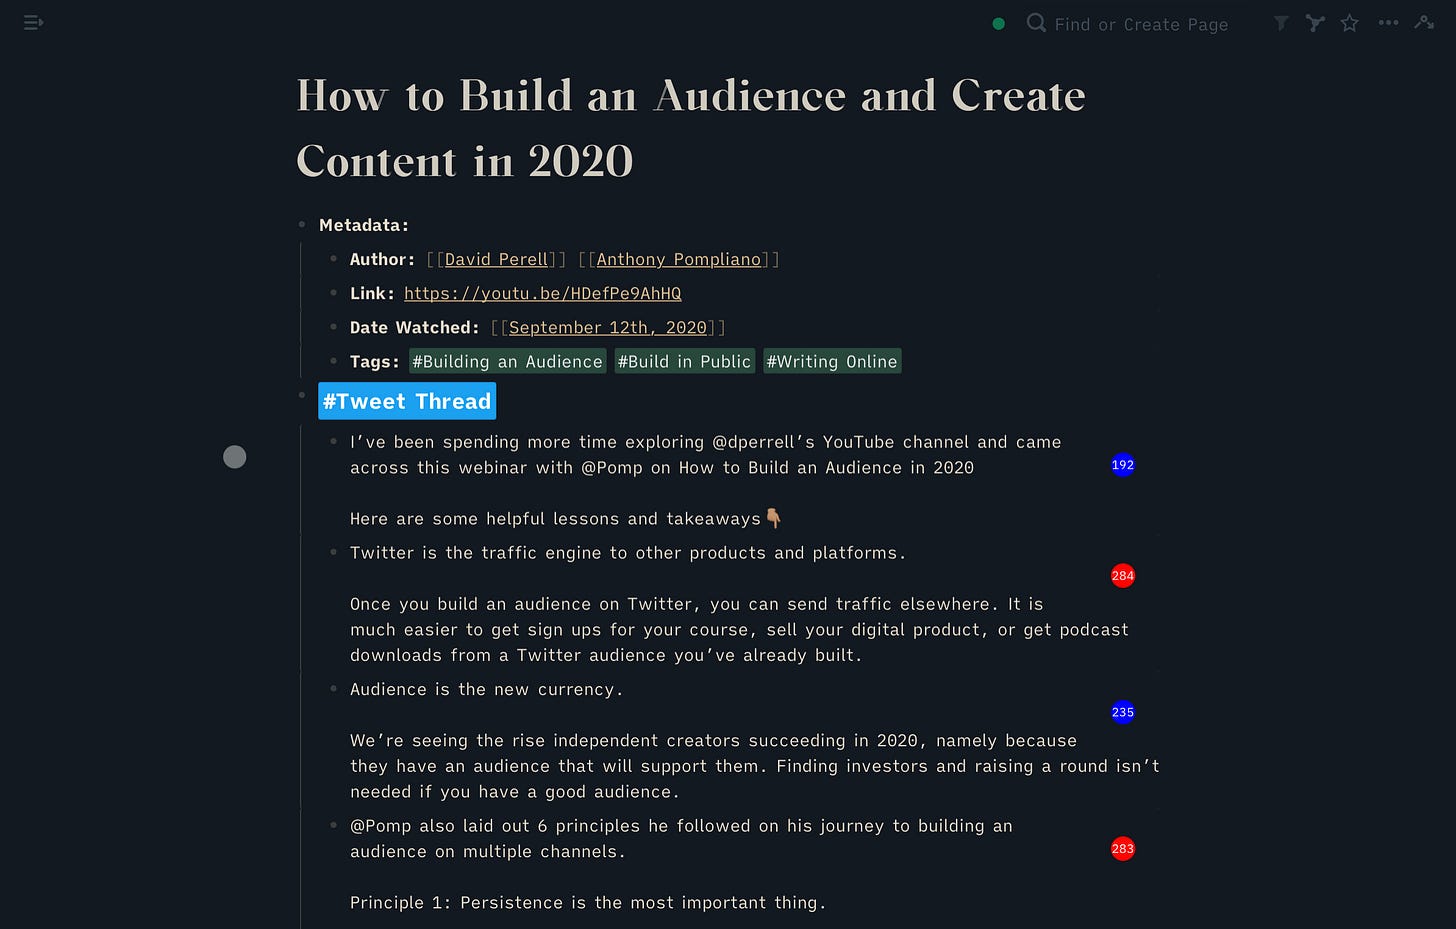
Oh one other great use case for Roam in terms of creation: Tweet Threads. Sometimes, I’ll watch a webinar and want to create a Tweet Thread for it. I’ll take my notes in a Roam page and then have that page open in the sidebar as I write my Tweets into Roam (you can also use a command to count characters to see how long they are). There is some talk about Tweeting directly from Roam but I prefer to copy and paste to Twitter even though it’s slower just so I can see what the the thread will look like before I tweet.

And there you have it. That’s my Digital Studio in a nutshell. Thank you for reading and checking it out! I’m hoping to do more of these posts with various people I meet online both so I can learn how to improve my workflow but also so that you can get a glimpse into the Digital Studio of someone else.
If you enjoyed this post, I’d love if you could share it with one friend! And if you haven’t yet subscribed you can do so below!


